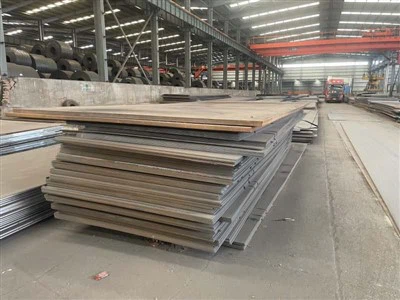
Galvanized steel pipes are a popular choice for various applications due to their durability, corrosion resistance, and affordability. As a leading Galvanized Steel supplier, I'm often asked about the proper installation process for these pipes. In this blog post, I'll guide you through the step-by-step process of installing galvanized steel pipes, ensuring a successful and long-lasting installation.
Preparation
Before you begin the installation process, it's crucial to gather all the necessary tools and materials. Here's a list of items you'll need:
- Galvanized steel pipes of the appropriate size and length
- Pipe cutter or hacksaw
- Pipe wrenches
- Thread seal tape (Teflon tape)
- Pipe fittings (elbows, couplings, tees, etc.)
- Measuring tape
- Marker or chalk
- Safety goggles and gloves
Step 1: Planning and Measurement
The first step in installing galvanized steel pipes is to plan your layout and take accurate measurements. Determine the route the pipes will take and mark the locations for fittings and connections. Use a measuring tape to measure the length of each pipe section and mark the cutting points with a marker or chalk.


Step 2: Cutting the Pipes
Once you have marked the cutting points, it's time to cut the galvanized steel pipes. You can use a pipe cutter or a hacksaw for this task. If using a pipe cutter, place the cutter around the pipe at the marked cutting point and tighten the cutter until it grips the pipe firmly. Then, rotate the cutter around the pipe, tightening it slightly with each rotation until the pipe is cut. If using a hacksaw, use a fine-tooth blade and make a straight cut along the marked line.
Step 3: Deburring the Pipes
After cutting the pipes, you'll need to deburr the edges to remove any sharp or rough edges. You can use a file or a deburring tool to smooth the edges of the pipes. This step is important to prevent damage to the pipe fittings and to ensure a proper seal.
Step 4: Threading the Pipes
If you're using threaded pipe fittings, you'll need to thread the ends of the pipes. You can use a pipe threading machine or a hand threading die for this task. If using a pipe threading machine, place the pipe in the machine and adjust the settings according to the size of the pipe. Then, turn on the machine and thread the end of the pipe. If using a hand threading die, place the die on the end of the pipe and turn it clockwise to thread the pipe. Make sure to apply a lubricant to the die to prevent it from overheating and to make the threading process easier.
Step 5: Applying Thread Seal Tape
Before connecting the pipe fittings, you'll need to apply thread seal tape to the threaded ends of the pipes. This tape helps to create a watertight seal and prevents leaks. Wrap the thread seal tape around the threaded end of the pipe in a clockwise direction, starting from the end of the pipe and working your way towards the middle. Make sure to wrap the tape tightly and evenly, covering all the threads.
Step 6: Connecting the Pipe Fittings
Once you have applied the thread seal tape, it's time to connect the pipe fittings. Start by selecting the appropriate fitting for the connection and screwing it onto the threaded end of the pipe. Use a pipe wrench to tighten the fitting, making sure to turn it clockwise. Be careful not to over-tighten the fitting, as this can damage the threads and cause leaks.
Step 7: Testing the System
After connecting all the pipe fittings, it's important to test the system for leaks. Turn on the water supply and check for any signs of leaks at the connections. If you notice any leaks, turn off the water supply and tighten the fittings further. If the leaks persist, you may need to replace the fitting or the pipe section.
Step 8: Securing the Pipes
Once you have tested the system and ensured that there are no leaks, it's time to secure the pipes in place. You can use pipe clamps or hangers to secure the pipes to the wall or ceiling. Make sure to space the clamps or hangers evenly along the length of the pipe to prevent it from sagging or vibrating.
Step 9: Insulating the Pipes
If the galvanized steel pipes are located in an area where they may be exposed to freezing temperatures, it's important to insulate the pipes to prevent them from freezing and bursting. You can use foam insulation sleeves or fiberglass insulation to insulate the pipes. Make sure to cover the entire length of the pipe, including the fittings and connections.
Conclusion
Installing galvanized steel pipes is a relatively straightforward process that can be completed by anyone with basic plumbing skills. By following the steps outlined in this blog post, you can ensure a successful and long-lasting installation. If you have any questions or need further assistance, please don't hesitate to contact us. We're a leading Galvanized Steel supplier, and we're here to help you with all your galvanized steel pipe needs. Whether you're looking for Galvanized Square Tube, Ppgi Steel Coils, or DX51D Galvanized Steel Sheet, we have the products and expertise to meet your requirements. Contact us today to discuss your project and learn more about our products and services.
References
- "Plumbing Handbook" by John Doe
- "Galvanized Steel Pipe Installation Guide" by ABC Company